Posts

Showing posts from 2018

Honda CT90 Engine Reassembly

Image
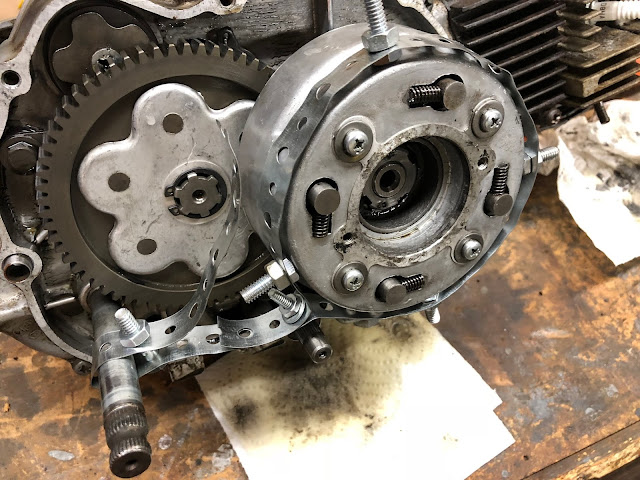
I have one 1971 CT90 where I was going to rebuild the clutch because the kickstarter just wasn't turning over the engine like it used too,  and I also had a Big Bore kit from DrATV that I wanted to install. My intent was to just do the top end and rebuild the clutch with new disks, but when I opened up the cases to rebuild the clutch pack I found a slick black slime in the bottom of the case.  I didn't like the idea that there could be black slime in the rest of the engine, so I decided to disassemble the entire engine to make sure I cleaned everything out.  Since I was tearing everything apart I thought I would document step by step how everything goes back together in this post in case others were interested in knowing what the inner workings of a CT90 engine look like. Links to Related Posts: My Honda CT90 Clutch and Headset Nut Tool Cut Away of a CT90 Engine - CT90 Engine Exposed! Repairing Damaged CT90 Spark Plug Threads Using a Time-Sert Thread Insert CT90 Cl...
Listing of Parts available on Amazon That Can be used on a CT90, CT200 & CT110

I have mixed feelings about Amazon as in some respects they are really taking over the world, but in the end they have become the simplest and quickest way for my family and I to get what we need. While Amazon may not always the cheapest place to buy things and some of their third party sellers are kind of questionable, I have generally always had a good experience purchasing item from Amazon. Since I tend to make a lot of my purchases on Amazon, I have also started to buy much of what I need for a number of the Honda CT90 projects I am working on. While Amazon may not have many of the small unique CT90 parts like what is available on DrATV, they do have most if not all of the general parts you end up replacing on a CT90 project bike that has sat on the side of someones barn for the last twenty years. Since it's not always easy to find things on Amazon, I decided to make a page on my blog at the link below where I have collected together a number of the CT90 related items pe...

Dynamic Timing a Honda CT90 or similar Single Cylinder Motorcycle

Image
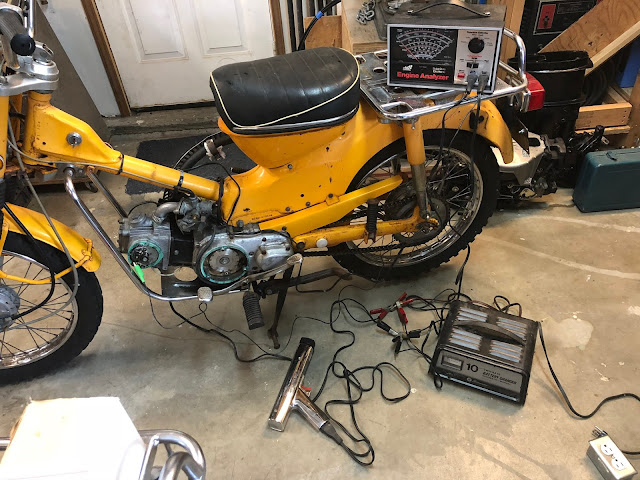
In general, I have always statically timed the CT90's that I own and have been happy with the results. The bikes are easy to start and have good performance (assuming the plug, points, coil and wiring were all good...), b ut I have always wondered if  dynamically timing my CT90's would make much of a difference, so I decided to dig out my dwell meter and timing light and spend some time dynamically timing one of my CT90's to see what I could learn and then share that information here in this post. I also did an earlier post that included how to statically time a CT90 at the following link:  The Basic Sequence and Process to Set or Adjust your CT90 Timing

Product Review - Audew Multi-Function Jump Starter

Image
Product Review - Audew Multi-Function Jump Starter This is a review of a small lightweight multi-function jump starter and portable power source made by Audew.  While not directly related to Honda CT90's, this is a handy device to have available to start a dead battery in your primary vehicle or charge up your cell phone or other USB powered devices while out on a remote backcountry ride on your CT90. The Audew multi-function Jump Starter is  available at Amazon here at this link . I want to acknowledge upfront that I received this multi-function jump starter from the manufacture in exchange for doing this review.  The link to Audew's website is here in case you were interested in other products from Audew.

Harbor Freight/Haul Master Motorcycle Carrier for use with a CT90

Image
Product Review - Harbor Freight/Haul Master Motorcycle Carrier use with a CT90 A few months ago I picked up a Haul Master motorcycle carrier from Harbor freight to use to haul around CT90's that I own. The carrier normally sells for $124.99, but it was a holiday weekend when I bought the carrier and Harbor Freight had a special 25% off coupon so the cost was very close to $100.00 out the door which I though was a pretty good deal.

Making a Transparent Timing Cover for your CT90

Image
I was working on a post about dynamically timing CT90's recently and decided to make a clear plastic cover like the one in the picture below so that I could view the timing marks while the engine was running and not have to worry about the small amount of oil that splashes out.

Product Review - Audew 150 psi Heavy Duty Double Cylinder Air Compressor

Image
Product Review - Audew 150 psi Heavy Duty Double Cylinder Air Compressor This is a review of a small portable 12 volt air compressor that is unique in that it is configured with a single motor that drives a piston and cylinder located at each end of the motor to where the combined output for the two cylinders is up to 150 psi.  While not directly related to Honda CT90's, a compressor like this is a handy device to have available if you take your CT90 out camping, Hunting, etc. and need to top off your tires with air. I want to acknowledge upfront that I received this compressor from the manufacture in exchange for doing this review.

Honda CT90 Wire Harness Detailed Information

Image
I recently had a number of CT90 main wire harnesses that I had to do some minor repairs on, so I thought I would do a post to share some detailed information that might be beneficial to someone else  working on their CT90's wire harness or maybe even someone wanting to build one from scratch. At the beginning of this post I'll explain some of the differences between the wire harnesses and then later in the post I will show the 1971 version of a CT90 harness completely disassembled so you can see what the individual wires look like and I will detail the process I follow to reassemble that harness back into an installable configuration. I also included detailed information on the measurements related to the harness and a table of how long each of the individual wires are in case someone decided they wanted to build a harness from scratch. Wire harness Differences Here is a picture of the three harnesses I was working on.

How to Test Your CT90 or CT200 Rectifier

Image
One part on the CT90 that can degrade with time and also cause a variety of issues that don't seem to have an obvious cause is the rectifier. Links to Related Posts CT90 Rectifier Upgrade Basic Test of a CT90 Condenser Basic CT90 Ignition Coil Check If you have an old CT90 that you are trying to bring back to life, I would recommend just going ahead and upgrading your rectifier to a newer more modern solid state design and I made a post here on how to do that yourself .  But if you would like to use the rectifier that came with your bike or if you are really trying to restore your CT90 back to the original configuration, I'll show you how to test your rectifier to see if it is good or bad as it's really a very simple test to do.

How to Test Your CT90 Condenser

Image
One item often overlooked on a CT90 when trouble shooting is the condenser that is mounted with the ignition coil.  The primary function of the condenser is to prevent arcing at the ignition points when the points open which results in a spark being generated at the spark plug.  The condenser also to a lessor degree, helps maintain the spark at the spark plug. Links to Related Posts CT90 Rectifier Upgrade Basic CT90 Ignition Coil Check How to Test Your CT90 Rectifier Unlike CT90 ignition coils which can be 50 years old and still be in great shape, a condenser is really just a capacitor and capacitors can and will degrade with time, so its always worthwhile to take the time to test the condenser, especially if you have gone to the trouble to remove the coil/condenser assembly from your CT90. There are a couple of different ways you can check your condenser to determine if it is performing correctly. The first approach is to make a couple of subjective observations o...

Repairing Damaged CT90 Spark Plug Threads Using a Time-Sert Threaded Insert

Image
I had a cylinder head where the threads for the spark plug hole had stripped out and needed to be repaired and I decided to use a Time-Sert to repair the treads.  This was my first time using a Time-Sort so I decided to do a post here to share the process that you go through and what the final installed insert looks like.  I have used Helicoil's in the past to repair damaged threads on other bikes I have owned so I first started to look for a Helicoil repair kit and the ones I found were around $48.00 dollars which sounded high and while I find Helicoil's fine for most repairs, for a spark plug hole they are not really idea in my opinion as you'll be removing the spark plug on a regular basis and I would prefer something more robust and permanent. In digging around on the internet I came across Time-Sert thread repair kits that use a very robust looking insert which I liked, but I was shocked at the price of the kits where the cheapest I could find was still around $88.0...

Honda CT90 Engine Reassembly

Image
I have one 1971 CT90 where I was going to rebuild the clutch because the kickstarter just wasn't turning over the engine like it used too,  and I also had a Big Bore kit from DrATV that I wanted to install. My intent was to just do the top end and rebuild the clutch with new disks, but when I opened up the cases to rebuild the clutch pack I found a slick black slime in the bottom of the case.  I didn't like the idea that there could be black slime in the rest of the engine, so I decided to disassemble the entire engine to make sure I cleaned everything out.  Since I was tearing everything apart I thought I would document step by step how everything goes back together in this post in case others were interested in knowing what the inner workings of a CT90 engine look like. Links to Related Posts: My Honda CT90 Clutch and Headset Nut Tool Cut Away of a CT90 Engine - CT90 Engine Exposed! Repairing Damaged CT90 Spark Plug Threads Using a Time-Sert Thread Insert CT90 Cl...

CT90 Clutch Pack Assembly Detail Build-up

Image
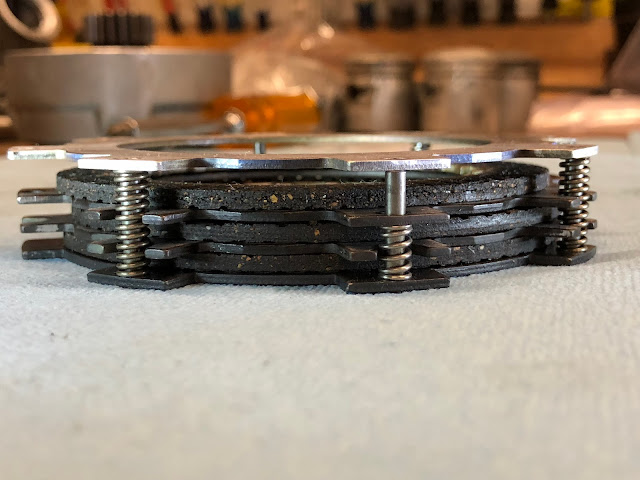
All CT90's at some point in their life will have the clutch start to slip and require the clutch assembly to be rebuilt. Links to Related Posts: CT90 Engine Reassembly Making a Low Cost Clutch Holding Tool for Your CT90 Shift Drum Stopper Replacement When Doing a Clutch Rebuild I have one CT90 where I could tell the clutch was starting to slip because the kickstarter just wasn't turning over the engine like it used too, so I decided to rebuild the clutch.  I don't normally tear the whole clutch pack apart when I install new clutch disks, but when I opened up the cases on this bike I found a slick black slime everywhere, so I decided to disassemble the entire clutch assembly (and actually the rest of the engine...) to make sure I cleaned everything out.  Since I was tearing everything apart I thought I would document how everything goes back together in this post in case others were interested in knowing what the inner parts of the clutch pack look like. I have als...

DURO HF307 Tires for a Honda CT90

Image
I was recently looking for an inexpensive all around tire and when I found the DURO HF307's in a 2.75 x 17 for only $23.12 at Cedar Rapids Tire I decided to give them a try.  The DURO HF307 is DOT approved and has a trials style tread pattern which is just what I needed for my casual around town riding.

Product Review - Shindy Intake/Exhaust Valve Set #07-002 for use on a Honda CT90

Image
I am in the middle of adding a DrATV Big Bore Kit to my 1971 Honda CT90 and when I pulled and disassembled the head both the exhaust and intake valve had a pretty significant groove around the area where the valve seats.  The bike was running fine before I pulled it apart, so I could have just cleaned everything back up and used the old valves, but since I had it apart I figured I would replace the valves if I could find a set that wasn't too expensive. I spent some time on eBay and kept seeing sets of valves made by Shindy with a part number of #07-002.  The funny thing was when the ad on eBay was for a CT90 the price was around $19.00, but I noticed the same set of valves being sold for Honda ATC's with no mention of CT90 and the price was only $13.55 with free shipping from within the USA which I thought was a great deal. I ended up ordering the valves from eBay seller parts_giant and in a few days the parts showed up in my mailbox.  You can also get this set of v...

How to Paint Honda CT90 Side Cases

Image
I am in the process of installing a DrATV Big Bore kit on a 1971 CT90 that I own and I am also replacing the clutch disks at the same time, so since I was into the engine that far I figured I'd pull the other side cases and clean them up and paint all three side case that came originally painted from Honda. This is the first time I have painted the side cases on one of my motorcycles, so I spent a little time searching the web to see what other people were doing as far as what paint to use. T settled on using the self etching primer and paint color shown in the picture below.

Listing and Links to Old Honda CT90 Patents

Image
I was working in my shop the other day prepping some side cases for paint from one of my CT90's and noticed the "PAT. APPLN. PEND" that is cast into the side of one of the cases just above the high/low range gearbox and selector and I started wondering what if anything, Honda had actually patented on the CT90.

Making a Very Low Cost Clutch Holding Tool for your Honda CT90

Image
In this post I want to share a very simple and inexpensive way to build a clutch holding tool with plumbers tape. Update: I now make and sell a clutch holding tool that also can be used to loosen your headset nuts and more info is available here at a post I made at this link . There is a good chance with every Honda CT90 that at some point in its life you are going to have to rebuild the clutch.  Rebuilding your clutch isn't really all that difficult of a task to do, and it has the added benefit of allowing you access to clean your oil screen and also to check to make sure your shift drum stopper hasn't developed any cracks (see: Shift Drum Stopper Replacement When Doing a Clutch Rebuild ) While the overall effort to replace your clutch disks is very straight forward, there are two steps in the process that can be a bit of a pain if you don't have the right tools.  The challenging steps are with finding a way to hold the clutch assembly and keep it from rotating wh...

A Way to Soften Up Old Rubber CT90 Motorcycle Parts That Works Well

Image
One of the most frustrating things I have found when working on old CT90's is dealing with the rock and rubber boots at each end of the air cleaner.  When these rubber parts a old, hard, and stiff it can make it a real pain to get in or remove the air cleaner and get access to the carb.  When I first started working on CT90's I found the use of a hair dryer to heat up these rubber parts which made them soften up, but it was only temporary and once they cooled down they became rock hard once again. I didn't want to buy all new rubber parts for my CT90's as I have too many bikes and I get more enjoyment out of doing things myself and learning about different techniques, so I went on a quest to see if there was a good method to permanently soften old rubber motorcycle parts and I came across the following four YouTube video's: Video 1 (I really enjoy all of Ichiban's videos), Video 2 , Video 3 , and Video 4 . After looking at the above videos and actually a...

Honda CT90 Air Filter Element Differences

Image
I have a 1971 CT90 that I plan to install a Big Bore cylinder and piston that I picked up from DrATV and thought that since I am adding a bigger piston I should look at doing what I can to open up the air flow going to the carb.  So, I started digging through my parts bin for air cleaner parts and noticed that the elements that support the foam air filter are not all the same and actually have have evolved quite a bit with the most recent configurations designed to allow greater air flow. From the parts I have in my bin, I think I have figured out what air filter element parts I will use with my Big Bore project so that I have the least restriction and therefore the greatest air flow, but since I was spending the time looking at the differences between these parts I figured I would to do a post here to share what I have observed, focusing on the air filter supporting elements used on the K2 and later versions of the CT90 and CT110. The specific parts that I want to focus on ar...

Light Rust Removal from Chrome Plated Parts

Something that you'll run into with almost any CT90 project bike that you pick up is having to deal with light rust on the parts that are chrome plated.  With these parts you can't simple remove the rust by an abrasive means like you would on a painted part of the bike as you would destroy the chrome, so you need to take a more gentle approach to try and remove the rust, but not do any damage to the chrome plating. There was a recent exchange on the Honda CT 90 Owners Facebook group that addressed this very question and everyone who participated provided there own approach for removing light rust.  There were a lot of great suggestions so I thought I would share them here.