I had a cylinder head where the threads for the spark plug hole had stripped out and needed to be repaired and I decided to use a Time-Sert to repair the treads. This was my first time using a Time-Sort so I decided to do a post here to share the process that you go through and what the final installed insert looks like. I have used Helicoil's in the past to repair damaged threads on other bikes I have owned so I first started to look for a Helicoil repair kit and the ones I found were around $48.00 dollars which sounded high and while I find Helicoil's fine for most repairs, for a spark plug hole they are not really idea in my opinion as you'll be removing the spark plug on a regular basis and I would prefer something more robust and permanent.
In digging around on the internet I came across Time-Sert thread repair kits that use a very robust looking insert which I liked, but I was shocked at the price of the kits where the cheapest I could find was still around $88.00 for a M12 x 1.25mm repair kit. Rebuilding CT90's is a hobby for me, so I figured this wouldn't be the first cylinder head I would have to repair, so I broke down and made the $88.00 investment for the Time-Sert kit. While I purchased my kit on eBay, it can also be purchased on
Amazon here at this link.
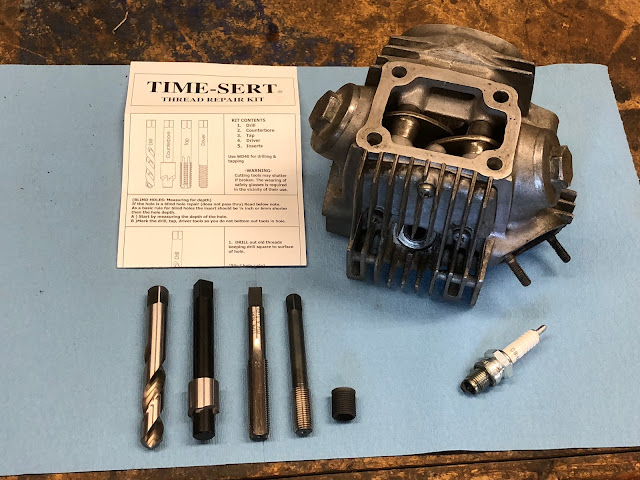
The kit I purchased came with a drill bit, a custom counter boring tool, a threading tap the threads on the OD of the insert, a special tool that is similar to a threading tap that is used to install the inserts and five threaded inserts, instructions, and a nifty plastic storage case.
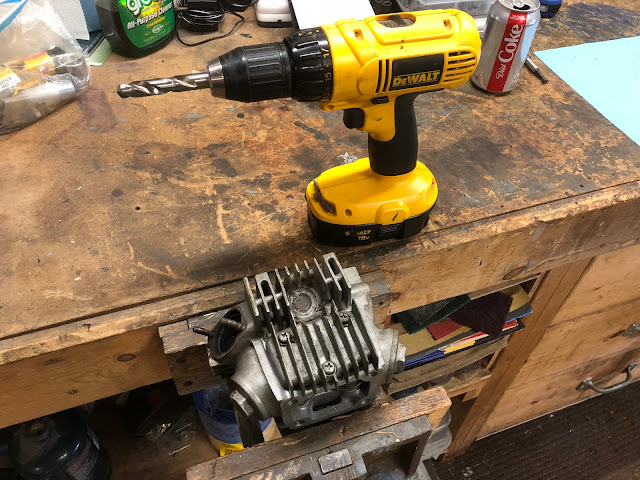
The process is really pretty straight forward and the first step is to drill out the spark plug hole using the drill bit included in the kit. I have a wood working vise on my bench which works great for holding the cylinder head and with the head mounted in the vise I drilled out the hole with a focus on keeping the drill perpendicular to the hole.
The next step of the process is to use the special counter boring tool to cut a recess that will later accept the rim of the repair insert. The counter boring tool mounts in your drill like a drill bit and I just ran it at a relatively slow rpm. The tool has built in features that help keep you from going to deep.
Here is the hole with the finished counter bore.
The next step is to use the threading tap included in the kit to cut the tread that the external threads of the repair insert will thread into. I used a tap handle that I have in my shop to hold the tap and I also used some cutting/tapping fluid for this step of the process.
You tap the hole just like you would using any other tap making sure to run the tap all the way through the hole so that you have good threads all the way through.
The next step of the process you use the special tool included in the kit that looks like a tap, but is actually a tool that forms the lower few threads in the insert that are undersized and this forming action is actually what locks the insert in place.
For this step you need the special tool, special oil that time-sent recommends be used with their tools and inserts, and a repair insert.
With the special tool installed in a tap handle you apply the oil to the threads of the tool and then you thread on an insert until you feel resistance.
The next step is to thread the insert into the spark plug hole until the rim of the insert is in the counter bore you cut earlier.
At this point you are supposed to continue to screw the special tool to complete the installation of the insert, but I decided to double check how the insert looked from the combustion chamber side of the hole and found that the 15mm long inserts that came with my Time-Sert kit were to long and protruded into the combustion chamber. This wasn't going to work so I unscrewed the insert (which would not have been possible if I had completed the installation) and went back on the internet to find some shorted inserts.
I ended up finding some 11mm long inserts at Amazon and when I screwed them into the hole they worked out to be the perfect length. The picture below is of an insert that has been screwed into the hole, but has not yet had the special tool/tap screwed through it to complete the installation.
With the correct length insert, I then screwed the lubricated special tool/tap through the insert to complete the installation.
Here is a picture of what the insert looks like from the combustion chamber side after it has been installed.
And another picture from the outside of the cylinder head.
And another one from the combustion chamber side with a spark plug installed in the repaired hole.
Overall I really like the
Time-Sert thread repair insert system available at Amazon and think it is a great way to go. It's definitely not cheap as you could just buy another cylinder head (or maybe even a parts bike) for what I spent on the repair kit and the additional 11mm long inserts, but if you really want to repair your existing cylinder head this is probably the best method available to do the repair.
Helpful Links (Shop Manuals, Wire Diagram, Model Information, etc.)
Link to page with listing of CT90 parts available on Amazon


Comments
Post a Comment