If you do any work on your CT90 at some point or another I think everyone ends up rebuilding their carburetor and one of the most difficult task can be getting your jets clean, especially the idle or slow jet that has a very small orifice.
In looking for an alternative to the standard carb cleaner like Berrymans B12 (which I think is about the best carb cleaner you can buy now days) I wanted to try something that hopefully would get down and clean the interior orifice of the jets which doesn't always seem to get clean with just standard carb cleaner, and even with Berrymans B12.
I found
this post on the web where someone used a toilet bowl cleaner called The Works. I like The Works and have used it to help de-rust CT90 gas tanks in the past, so I thought I would give it a try.
The Works is basically hydrochloric acid and Rodine (Rodine is an acid corrosion inhibitor) and this seemed like it should be effective on the varnish and the other crud that can build up in a carb. The Works is also very cheap and usually is on a couple of bucks for a 32 oz bottle.
Important: Given the Works is hydrochloric acid you should always wear gloves and eye protection, but you also need to limit how long you expose your parts to The Works, because if they are left in too long the will start to get eaten away and pitted, especially aluminum parts
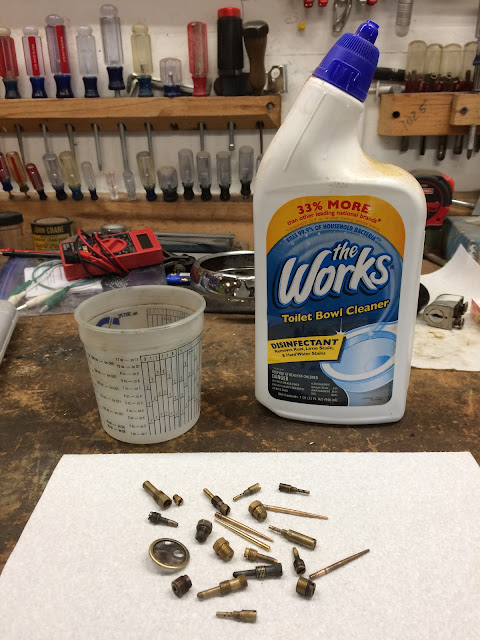
Here is a picture of the Works and the parts I intended to clean before I started the process.
Here is a close up of the parts prior to going through the cleaning process.
To clean the parts I placed them in a small container and then I poured in the Works so that all of the parts were covered.
I let the parts soak for a couple of hours and also would agitate the container from time to time while I was working in my shop.
After a couple of hours I drained off the Works and then rinsed the parts in white vinegar followed by a rinse of warm water. I then dried all of the parts and blew out all of the orifices with compressed air and in the end here is how the parts turned out.
While the parts are not super bright, they are clean and the orifices looked really good and clear. I may have left the parts in the Works for a little longer then needed as the copper was starting to leach out of the brass parts and plate out on some of the other parts.
Overall I think the Works did a good job and would be more than acceptable for general use in cleaning carb detail parts and jets. I still plan on looking at other cleaners to try and find something that is low cost and leaves all the parts with a very bright appearance.
I hope you found this helpful and if you have any suggestions on a good cleaning approach for detail carb parts I would like to hear about it.
Helpful Links (Shop Manuals, Wire Diagram, Model Information, etc.)
Link to page with listing of CT90 parts available on Amazon


Comments
Post a Comment