Posts

Showing posts from 2022

Honda CT90 Engine Reassembly

Image
I have one 1971 CT90 where I was going to rebuild the clutch because the kickstarter just wasn't turning over the engine like it used too,  and I also had a Big Bore kit from DrATV that I wanted to install. My intent was to just do the top end and rebuild the clutch with new disks, but when I opened up the cases to rebuild the clutch pack I found a slick black slime in the bottom of the case.  I didn't like the idea that there could be black slime in the rest of the engine, so I decided to disassemble the entire engine to make sure I cleaned everything out.  Since I was tearing everything apart I thought I would document step by step how everything goes back together in this post in case others were interested in knowing what the inner workings of a CT90 engine look like. Links to Related Posts: My Honda CT90 Clutch and Headset Nut Tool Cut Away of a CT90 Engine - CT90 Engine Exposed! Repairing Damaged CT90 Spark Plug Threads Using a Time-Sert Thread Insert CT90 Cl...
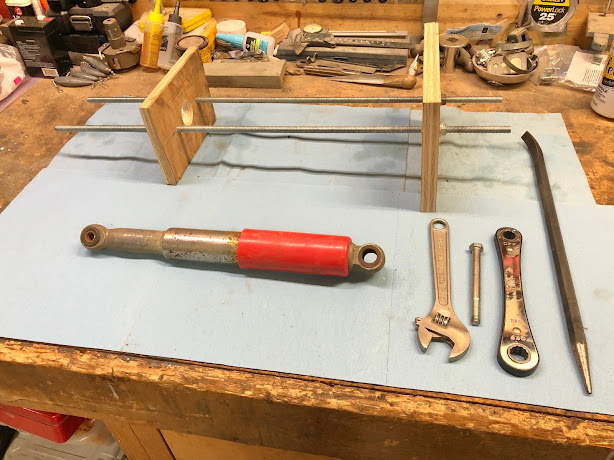
How to Disassemble a CT90 Rear Shock Absorber

Image
 If you are going through and cleaning up your first CT90 rebuild project, one of the things that is not so obvious is how to disassemble the rear shock absorbers. The process is pretty straight forward and while it is possible to disassemble the shock absorber without any special tools I find it much easier to make a simple tool to compress the spring on the shock absorber.

A 3D Printed Air Intake Boot for use on a Honda CT200

Image
 Recently someone on my Facebook page commented about a post I did where I shared information about a 3D printed air intake boot I designed for K0 CT90's and asked if I could design one for the CT200 and even offer to let me borrow an old CT200 air boot that had some issues to use to help construct a design. Related Posts: A 3D Printed Honda CT90 K0 Air Intake Boot Well I've actually had an old CT200 air boot on my desk for over six months as creating a 3D printed design has been on my list of things to do for quite some time. With the encouragement from the comment I received on Facebook, I sat down and created an initial design using my ViaCad 2D/3D Pro modeling software that I'm pretty happy with. Here is a picture of the 3D printed design I came up with and printed next to the stock Honda CT200 air boot.

A 3D Printed Functional Rear Air Filter Housing for use on a Honda CT90 K2 and Later

Image
I have on and off been looking at trying to model or scan some of the different CT90 air filter housings so I could make 3D printed versions, but have had limited success.  Related Posts:  CT90 K2 and Later Air Filter Housing 3D Printed Seal  After some effort I was able to create a functional design of the rear portion of the air filter housings used on K2 and later CT90's.  The picture below is of the next to the last configuration that I designed and then printed during a trial fit on one of my bikes.

A 3D Printed Seal for use on a Honda CT90 K2 and Later Air Filter Housing

Image
One part that is not readily available for the Honda CT90 is the seal that fits in the groove at the rear edge of the main air filter housing on K2 and later CT90 models.   I have been having success using TPU to print basic seals for other applications and thought it would be a good material to make this seal for the air filter housing. Using ViaCad Pro version 12, I came up with a design and then printed it out using TPU.  The picture below is of the TPU 3D printed seal on the left and a stock Honda rubber seal on the right.